eOrganic authors:
Micaela Colley, Organic Seed Alliance
Alex Stone, Oregon State University
Linda Brewer, Oregon State University
This is an Organic Seed Resource Guide article.
Introduction
Proper post-harvest processing is critical to maximize yield, longevity, vigor, and overall quality of the seed crop. At maturity, seed must be harvested, threshed, cleaned, and fully dried before storage. Each of these steps requires proper timing, skills, and in some cases, equipment. Investing in the long growing season of a seed crop, only to lose it with improper harvest and post-harvest handling, is an incredibly frustrating experience. While production of vegetable seeds is similar in many respects to vegetable production, post-harvest practices require knowledge and methods unique to seed production. For organic producers, timing of maturation and harvest can be particularly critical to avoid losses from seedborne diseases or insect pests.
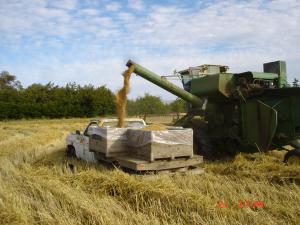
Harvesting seed with a combine at Nash's Organic Produce, Sequim, WA. Photo credit: Nash Huber, Nash's Organic Produce
Organic certification standards also require use of equipment that is cleaned or not contaminated by use in conventional fields. Seed cleaning activities must be conducted either on a certified organic farm or in a professional cleaning facility that is certified organic. Packaging, shipping and storage of organic seed must be clearly labeled as organic. The following resources provide guidelines for seed harvest and post-harvest handling. In addition, many seed crop production guides also provide harvesting guidelines.
For more specific information on maturation and harvest, see the eOrganic article Organic Carrot, Onion, and Beet Seed Maturation and Harvest in the Pacific Northwest and California
Threshing
Threshing is the process of removing seeds from the plant and breaking up remaining plant materials (e.g., stems and leaves), into what is called chaff. The dry seed heads attached to the plants are rubbed or crushed to release the seed and break down the plant material. This step facilitates the subsequent separation of the seeds from the plant materials in the seed cleaning process. Threshing may be done by hand or machine, depending on the scale and type of seed to be processed.
Seeds and plant materials should be dry before threshing. This can be checked by squeezing a handful of seed and plant material. Dry seed and plant material will not have any give while moist materials will give in your hand. If the seeds can be squeezed, or "give" in your hand, or the plant material feels moist, they are not yet dry. For many crops, seeds can be stripped from the plant by hand before threshing in order to minimize the amount of material that must be dried and broken up.
Threshing Techniques
Threshing can be accomplished by stomping or "dancing" on top of the seed heads, rubbing by hand, or by using a variety of machines. With crops that are more delicate (e.g., beans), it is preferable to wear soft-soled shoes and stomp gently to prevent damage. For small seed lots it is often more efficient to thresh by hand than to thresh with mechanical threshers. Mechanical threshers increase efficiency of processing lots over about 50-100 lbs, but usually require a large enough quantity to operate properly and can require substantial work to clean out the machine after use.
To thresh by hand, lay the seed bundles on a tarp or in a large bucket. Wiggle your feet from side to side on top of the seeds, allowing the ball of your foot to slide in place left to right, as if you were squishing a bug. Make sure to always have several inches of seeds and chaff between your foot and the bottom of the bucket or the ground while crushing. Crushing seeds directly on a hard surface, or for too long, can damage the seeds. Each crop varies in sensitivity to pressure, so it is important to check the seeds to see if they have received sufficient pressure to break free from the plant material or if they are cracking from too much pressure. More delicate seeds can also be threshed by rubbing between your hands with a pair of gloves or rubbing the seed and plant material over a rough surface by hand.
For threshing large seed lots, farmers and seed professionals often use commercial threshing machines (belt threshers or combines), or adapt mulching equipment into threshing machines.
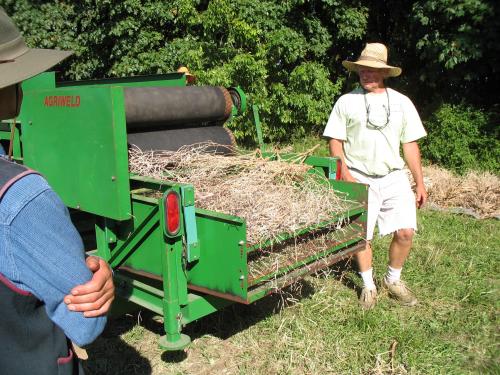
Frank Morton demonstrates belt thresher at Wild Garden Seed. Photo credit: Micaela Colley, Organic Seed Alliance
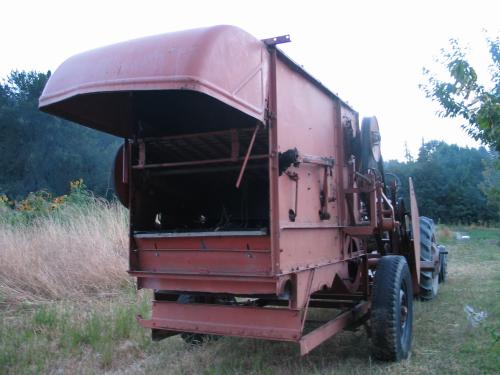
Stationary field thresher. Photo credit: Micaela Colley, Organic Seed Alliance
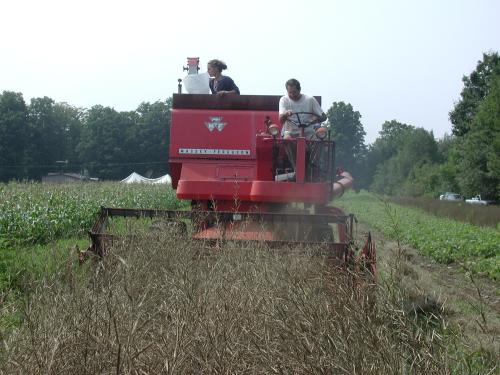
Field combine. Photo credit: Tom Stearns, High Mowing Seeds
Seed Cleaning
Cleaning Dry Seeded Crops
Dry seeds are seeds that are matured in a dry state rather than inside of a fruit. In the harvesting process and after threshing, dry seeds are usually mixed with other plant materials such as sticks and leaves, dirt, stones, and weed seeds that are inadvertently collected with the harvested seed. The seed is then cleaned (separated from the other material) by techniques based on differences in weight, size, or shape of the seed. There are also machines that separate the seed from other materials based on electromagnetic charge or on the color of the seed, but these machines are expensive and typically only used by larger seed companies.
Separation based on size:
Screens with various hole sizes are commonly used to separate seeds based on size either by hand or by machine. Commercially-available seed cleaning screens are categorized (by width of holes) in the US in increments of 1/64th of an inch. For example, a #6 screen has openings that are 6/64 inch in width. Screens are used to either permit the crop seed to pass through the screen (collect and discard material larger than the seed that does not pass through), or to retain the crop seed on top of the screen and permit smaller-sized materials to pass through and be discarded. Most screens have round holes, but some specialized screens are made for particular crops (e.g. oblong openings in special screens that permit lettuce seed to pass through and retain larger, round seed on top of the screen). Hand-held screens are very useful for small to medium scale seed cleaning (up to 50-100 lbs). The most common seed cleaning equipment which utilizes screens is manufactured by Crippen. These machines hold one or several interchangeable screens. The machine can be set up to perform multiple screening functions in one pass. For example, the first screen may retain larger chaff, with the second screen retaining the seed, and the third and smallest screen allowing smaller debris and small seed to pass through.
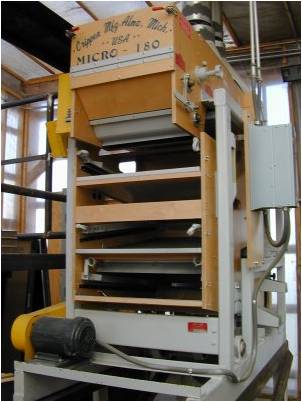
Crippen three-screen cleaner. Photo credit: Micaela Colley, Organic Seed Alliance
Separation based on weight (or specific gravity):
Cleaning seed by differences in specific gravity is one of the oldest seed cleaning techniques. When done by hand in the wind it is commonly referred to as winnowing. On the simplest scale, seed and materials are dropped before a wind source (either natural wind or a fan). The heavier materials fall closer to the wind source while lighter materials are carried further from the wind source. On a small-to-medium scale this is a very effective method to quickly clean seed. Many screen cleaners have a fan to assist in blowing off some dust and chaff.
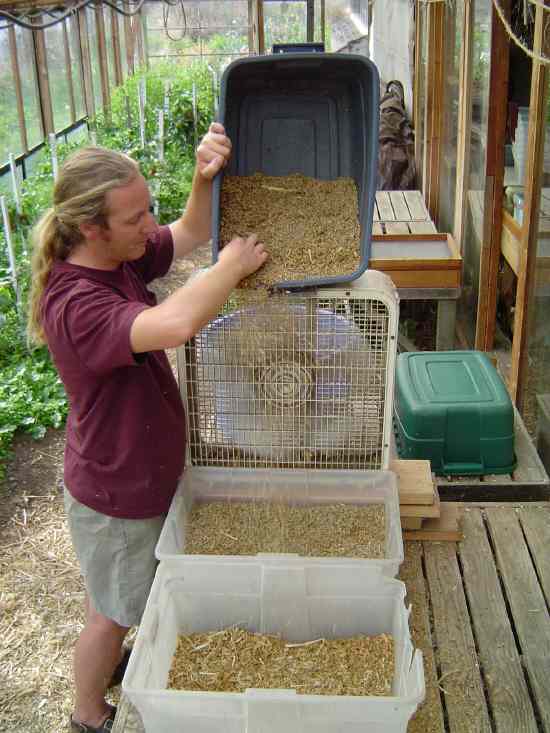
Winnowing or fanning seed with an electric box fan. Photo credit: Matthew Dillon, Organic Seed Alliance
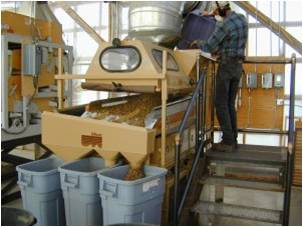
Separating seed based on specific gravity with a gravity table. Photo credit: Micaela Colley, Organic Seed Alliance
Gravity tables are probably the most widely used machines; they separate seeds by differences in seed weight. Gravity tables operate by blowing air up through the body of the machine which holds a fine-screened, tilted "deck" on the surface. The seed is fed by a hopper and passes over the deck. The screen openings are small, so no seed or material passes through, and the screening material has a slight nap that 'holds' the seed. The air moving through the screening lifts lighter material - it then 'floats' down the deck; the heavier material remains in contact with the screening material because of the nap - it moves up the deck.
Cleaning Wet-Seeded Crops
Wet seeds are seeds that are produced in a fruit such as tomatoes, cucumbers, and squash. They are processed by crushing the fruits by hand or with a wet seed extractor. Some wet-seeded seed crops benefit from a fermentation process following the extraction. Others can simply be washed thoroughly and dried.
Wet processing seed is a three-step process:
- Removal: For seeds located inside fleshy fruits and vegetables such as squash, cucumbers, and tomatoes, wait for the fruit to fully ripen on the plant. Typically, fruit is harvested at a stage that is much more mature than the maturity at which the fruit would be harvested for eating. Wash the fruit, then break open the fruit and remove the seeds. Clean pulp residue from seed by washing or fermenting (see below).
- Drying: Spread the seeds out on a tray in a warm, dry place, and let dry. Seeds should not reach temperatures over 95 F.
- Fermentation: Seeds such as tomato, pepper, cucumber, and squash are typically processed by fermentation as it facilitates removing the pulp from the seed and in some cases kills certain bacterial seedborne pathogens.
Fermentation of wet-seeded crops:
- Rinse dirt and debris from fruit.
- Mash the fruit and pour the mixture of seeds, pulp, and juice into a large container (garbage cans work well).
- Place bucket in a location at 75-80 F (24-27 C). Ferment tomatoes for up to three days and squash for up to 2 days, depending on the ambient temperature. At 75 - 80 F, fermentation may require 42 to 72 hours.
- Stir the fermenting mixture two or three times a day to aerate the mixture and facilitate even fermentation.
- In two to three days a white scum may appear on the top of the mixture. This is normal and indicates that fermentation is successfully taking place. After the two- to three-day period, seed is ready to be rinsed. Pour off the top layer of scum and pulp. Pour water into the remaining mixture so that the volume is doubled.
- Stir, allow the mix to settle again, and pour the top layer of pulp and debris off the top. Some lighter, less viable, seed may be poured off with this top layer.
- Repeat this washing process from 3 to 6 times, until the water is fairly clear.
- Pour the remaining contents (seed) through a large strainer retaining the seed and draining off the remaining water.
- Spread the drained seed out onto a fine screen to dry. Fine mesh window screening works well for most seeds. Distribute the seed on the screen so that the seed layer is as thin as possible (less than 1/4 inch). Avoid placing seed on paper, as drying seed may stick to the paper and paper may hold moisture. Stir the seed frequently to encourage even drying. If possible, place seed in front of a fan or gentle breeze to facilitate drying.
Mechanical wet seed processors, like the one in the figure below, operate under the same principles outlined above; fruit is crushed, seed and pulp are collected, and the fruit shell is discarded. Seed extracted with a mechanical processor may then be fermented if desired.

Mechanical wet-seed processor. Photo credit, Tom Stearns, High Mowing Seeds

Wet seed extractor. Photo credit: Tom Stearns, High Mowing Seeds
Web Resources
- Mechanical seed cleaning and handling [Online]. 1968. Agricultural Handbook 354. Agricultural Research Service, United States Department of Agriculture, and Oregon Agricultural Experimental Station. Available at: https://naldc-legacy.nal.usda.gov/naldc/catalog.xhtml?id=CAT87208718&start=0&searchText=mechanical+seed+cleaning+and+handling&searchField=&sortField= (verified 28 Jan 2020).
- Ohio State University seed identification website [Online]. Department of Horticulture and Crop Science, The Ohio State University. Available at: http://www.oardc.ohio-state.edu/seedid/ (verified 15 Mar 2010). Includes thumbnail photos of seeds by species. Useful for identifying contaminant seeds in your seed lot.
- Organic seed processing and storage guide [Online]. 2004-2010. J. H. McCormack, Ph.D. Available at: http://www.savingourseeds.org/publications.html (verified 12 Mar 2014). Excellent information on all aspects of seed processing and saving for all vegetable seed growers.
- Principles and practices of seed storage [Online]. O.L. Justice and L.N. Bass. 1978. Agriculture Handbook No. 506. United States Department of Agriculture, Science and Education Administration. Washington, DC. Available at: http://hdl.handle.net/1957/149 (verified 15 Mar 2010).
- Seed cleaning information [Online]. Public Seed Initiative, Cornell University. Available at: https://cpb-us-e1.wpmucdn.com/blogs.cornell.edu/dist/f/575/files/2015/12... (verified 10 Oct 2019).
- Seed processing and handling [Online]. G. Vaughn and J. DeLouche. 1968. Handbook No. 1. Seed Technology Laboratory, Mississippi State University. Available at: http://mcia.msstate.edu/pdf/seed-processing-and-handling_1.pdf (verified 15 Mar 2010).
- Small-scale thresher [Online]. C. Miles. 2005. Washington State University. Available at: http://vegetables.wsu.edu/
NicheMarket/ SmallScaleThresher.html (verified 15 Mar 2010).
Print Resources
- Seed to seed: seed saving and growing techniques for vegetable gardeners. S. Ashworth. 2002. Seed Savers Exchange, Decorah, IA.
- Seed storage of horticultural crops. S.D. Doijode. 2001. Food Products Press, New York, NY.
- Seeds handbook: biology, production, processing, and storage. B.B. Desai, P.M. Kotecha, and D.K. Salunkhe. 1997. Marcel Dekker Inc., New York, NY.
- Flower seeds: biology and technology. M.B. McDonald and F.Y. Kwon. 2004. CABI Publishers, Cambridge, MA.
- Principles of seed science and technology. L.V. Copeland. 1976. Burgess Publishing Company, Minneapolis, MN.
- Seed production principles and practices. M.B. McDonald and L.O. Copeland. 1997. Chapman and Hall, New York, NY.
- Seed to seed. S. Ashworth. 1991. Seed Savers Publications, Decorah, IA.
- Seeds handbook: biology, production, processing, and storage. B.B. Desai, P.M. Kotecha, and D.K. Salunkhe. 1997. Marcel Dekker, Incorporated, New York, NY.
- Vegetable and flower seed production. L.R. Hawthorn and L.H. Pollard. 1954. Blackiston Co., New York, NY. Out of print.
- Vegetable seed production. R.A.T. George. 1999. CABI Publishing, New York, NY.
- The wisdom of plant heritage: organic seed production and saving. B. Connolly and C.R. Lawn. 2005. Northeast Organic Farming Association of New York.
- Farmers’ seed production: new approaches and practices. 1999. C. Almekinders and N. Louwaars. Intermediate Technology Publications.
- Collecting, processing and germinating seeds of wildland plants. 1986. J.A. Young and C.G. Young. Timber Press. Portland, Oregon.


